 I’ve been hooked on kimchi ever since I visited Korea in 2005 (well, a touch
beforehand, since I spent the weeks before researching food - always a fun
time). I found a place in town to buy jugs of kimchi, which is certainly
delicious, but once I found out how easy it was to make, I’ve made it regularly
ever since. After a bad experience with some spoiled fish sauce, I’ve also been
making it vegan, which is the recipe I’ll post here. There are a ton of
different kinds of kimchi, but this is a recipe for kimjang kimchi, or Winter
kimchi; a spicy cabbage and onion based kimchi traditionally made in November or
December.
I’ve been hooked on kimchi ever since I visited Korea in 2005 (well, a touch
beforehand, since I spent the weeks before researching food - always a fun
time). I found a place in town to buy jugs of kimchi, which is certainly
delicious, but once I found out how easy it was to make, I’ve made it regularly
ever since. After a bad experience with some spoiled fish sauce, I’ve also been
making it vegan, which is the recipe I’ll post here. There are a ton of
different kinds of kimchi, but this is a recipe for kimjang kimchi, or Winter
kimchi; a spicy cabbage and onion based kimchi traditionally made in November or
December.
Ingredients
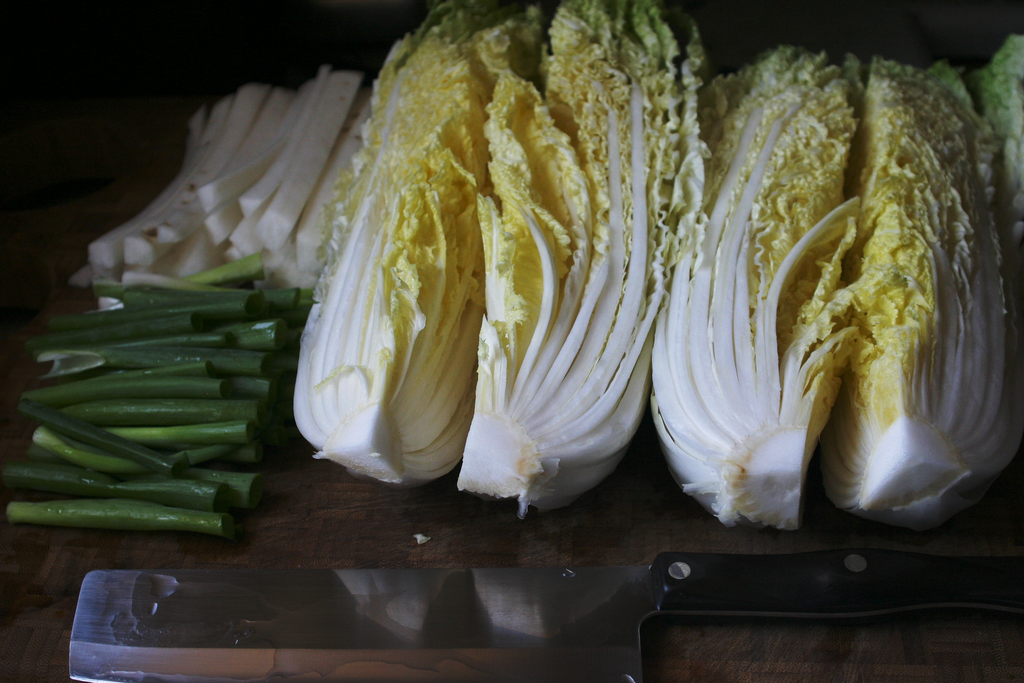
- 1 large Napa/Chinese cabbage
- 1 large diakon radish (about 6-8 inches long, 3-4 inches in diameter)
- 1 bunch green onions (about 10-12)
- 1⁄2 cup (approx.) salt for brine
Seasoning: * 2-3 cloves garlic * 1⁄4-1⁄2 cup Korean chili powder * 1⁄4 cup grated apple, Asian pear, or sweet (Vidalia) onion * 4 tbsp fish sauce or * 2 tbsp ponzu or light soy sauce, plus * 2 tbsp honey
Preparation
- Cut the vegetables: clean and trim the green onions and cut into 3” lengths; peel the radish and cut into 1⁄2” cubes or sticks; cut the cabbage into quarters lengthwise for “whole kimchi” which will be cut before serving, or cut those quarters into 2-3” lengths for prepared kimchi (make sure to remove the solid core if you’re doing this step).
- Mix the salt with about two cups hot water to disolve, then about 10 cups cold water to make a brine. This should be fairly salty, but not dessicating, so you may have to adjust salt or water.
- Put all the vegetables in a large bowl and pour the brine over. Press the vegetables down with a plate that fits within the rim of the bowl until they’re completely submerged in brine (you may have to top up with more brine) and weigh the plate down with something heavy - I use another bowl filled with water.
- Let the vegetables sit in the brine for 2-4 hours. Taste the cabbage at 2 hours and every half hour after until it seems ready. Rinse it off first; it should still be relatively crisp, but rather salty even after rinsing. The kimchi does not pick up salt from anywhere else in the process, so it should be about as salty as you would expect, without any sour or spicy flavors.
- At about two hours in mix the seasoning together in a bowl. Store in the fridge until needed.
- Drain the brine, reserving about 1⁄2 cup of it for later.
- Thoroughly mix the seasoning into the vegetables with your hands, making sure to cover all leaves of cabbage with at least a thin layer of the paste. Warning: wash your hands thoroughly after or, better, use food-safe gloves during the process. The Korean chili powder isn’t that spicy, but it does irritate eyes and other sensitive areas.
- Pack the raw kimchi into glass jars, leaving at least an inch of space at the top. Distribute the remaining of brine evenly between the jars. Put the lids loosely on the jars and store out of direct sunlight and away from heat sources (in a corner of the kitchen on the counter works for us). As the kimchi will bubble slightly as it ferments, you may want to store the jars in plastic grocery bags or on plates to catch any leaks. Twice a day, tighten the lid and carefully shake the jar to make sure everything is coated with the liquid.
- Store the kimchi like this for 2 to 4 days. At two days, it will be savory and ready to eat; store for additional time if you like your kimchi a little more sour and ripe. The kimchi is ready to eat and will keep for a few weeks in the fridge, steadily getting riper and more sour as time goes by.
Kimchi is great on its own when it’s still younger, served alongside food. As it gets more sour over time, it goes great in soups such as kimchi jjigae (spicy kimchi soup) and cooked in dishes such as kimchijeon, a type of savory pancake featuring kimchi. We tend to use the ripe kimchi to make kimchi fried rice: heat some vegetable oil in a pan, add about two cups of rice and about a half teaspoon of dried soup stock such as Japanese dashi or Korean dashida, or even half of a packet of ramen seasoning. Stir 1⁄2-1 cup of kimchi, and an equal amount of the juice from the jar and cook for an additional five minutes or so. Before serving, create a well in the middle of the pan and scramble an egg in there, slowly incorporating it into the fried rice.